How to Grow Your Own Oyster Mushrooms Indoors
Indoor gardening is versatile and productive, however, expanding and diversifying the crops grown is one way to make even more efficient use of limited growing space.
While technically not a hydroponic crop, growing oyster mushrooms is becoming a popular trend amongst indoor gardeners and one which fits in perfectly with a growroom environment and complements hydroponic systems and plants.
Oyster mushrooms have similar temperature requirements, love the humidity and shade produced by a dense canopy of adjacent foliage, and produce some additional CO2 to enrich the atmosphere for crop photosynthesis.
Much like hydroponics, oyster mushrooms are grown in small bags or buckets of soilless substrate, often sawdust or chopped straw, which is inexpensive and easy to source.
These fungi are particularly aggressive growers and will even fruit on damp cardboard, shredded paper, used coffee grounds, and several other different organic materials.
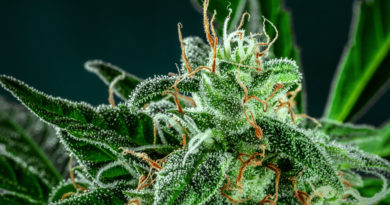
Oyster Mushrooms: Fancy Fungi
 Tropical pink oyster mushrooms are a warm-temperature species.
Oyster mushrooms are a gourmet fungi, often sold at premium prices in specialty produce stores, farmers markets, and Asian supermarkets. They are prized for their meaty texture and mild flavor and make a great vegan ingredient for several dishes.
There are a number of different types of oyster mushrooms including tropical pink, grey, pearl, and bright yellow and blue varieties, amongst others, all of which can be purchased online as either ready-to-grow kits or as grain spawn, used to “seed” bags of sawdust or other organic materials for fruit production.
Under good growing conditions, mycelium present on the grain spawn will rapidly colonize through the entire substrate, creating a dense white mass from which small mushrooms will begin to form anywhere from several days to within a few weeks.
While hydroponic plants in soilless substrate rely on mineral elements dissolved in water to provide the nutrition for plant growth and light to drive the production of sugars via photosynthesis, mushrooms break down organic material (in nature this is typically wood for oyster mushrooms), to obtain the energy and nutrients required for growth. (Read also: Companion Plants for Cannabis)
While they don’t need a lot of light for growth or to produce food, oyster mushrooms do prefer low-level illumination similar to what they would encounter on a dense forest floor to help with coloration and triggering fruiting. For this reason, they are perfect for under benches or shady, damp corners of a growing environment where green plants don’t thrive.
They also perform well inside propagation units where humidity is kept high and light restricted for rooting cuttings and clones.
How to Start Growing Oyster Mushrooms
 Three days after spawning mycelium can be seen growing from the grain spawn into the sawdust.
Unlike many other gourmet mushroom species, oysters are quick and relatively easy to produce, thus well-suited to beginners. Their particularly aggressive colonization of organic substrates and ability to out-compete other commonly occurring fungi and bacteria during their short lifespan is impressive and what makes the production of these gourmet delights so rewarding.
Method #1: Grow Kits
The easiest method to start oysters is to buy a ready-made kit containing a bag of substrate that has already been fully colonized by mycelium and only requires a cut in the front of the plastic for the mushrooms to grow out from.
Kits are ideal for beginners to observe the process from pinning through to the harvest and usually produce more than one flush of fruit. For those who want to go one step further, spawning your own substrate is rewarding for the relatively easy process.
The first basic step is to obtain a suitable growing substrate. While oyster mushrooms can be produced on a wide range of organic materials, starting with a relatively clean medium is a good option if sterilization (e.g. heat treatment with a pressure cooker) is not being used.
Compressed hardwood sawdust fuel or BBQ pellets are an ideal and inexpensive substrate which oyster mushrooms grow well on and are sold in hardware stores. After expansion with water, the pellets swell to many times their original size and hold sufficient moisture for mycelium growth and fruit production.
Substrate materials benefit from some pre-treatment to help kill off any potential microbial competitors. Some growers use a pressure cooker to heat-sterilize their substrate before seeding with grain spawn. Another method is to pasteurize with boiling water or steaming for a certain number of hours.
 Pellets of dry, compressed sawdust which are expanded with water make a great substrate for oyster mushrooms.
Method #2: Cold Pasteurization
A more basic method that works well for oyster mushrooms is cold pasteurization where the sawdust pellets are expanded with a solution of hydrated lime (straw can be soaked in this solution for a number of hours). This increases the pH of the substrate to high levels, at which mushroom mycelium is not inhibited, however, the germination of other microbial spores is giving the oysters a head start.
Once the mycelium has started to fully colonize the substrate, it has the ability to outcompete and kill off any competing unwanted microbes which may try to take over.
Hydrated lime is pure calcium hydroxide (also called builder’s lime, slaked lime, or pickling lime) and shouldn’t be confused with other forms of lime sold for garden use, and it must also be low in magnesium.
Once fully expanded with water to field capacity (a handful of sawdust squeezed should barely produce a drop of water), it is mixed thoroughly with the required amount of broken-up grain spawn (usually at a rate of at least 10 percent) and placed into growing bags or containers. (Read also: How to Create a Bag Garden)
Specialized mushroom growing bags are often available from suppliers of grain spawn online — these bags have a filter patch that allows gas exchange without allowing microbes to enter.
Some oyster mushroom growers prefer reusable, clean, and sterilized plastic buckets with holes drilled around the outside for air exchange from which the mushrooms will form.
As an even simpler option, the substrate can be placed into any type of thick plastic bag and holes poked at intervals around the sides for air flow.
Growing Conditions for Oyster Mushrooms
 Different species of oyster mushroom can be grown in the same environment.
Once the growing bag/container has been filled with the damp substrate and spawn mix, the mycelium is left to colonize under suitable temperature conditions for the type being grown. Pink oyster mushrooms are a tropical species and prefer temperatures in the range of 72-86°F (22-30°C), however, many other oysters are much cooler-temperature species and will grow within a range of 50-75°F (10-24°C).
After two to four weeks the bag or bucket should be fully colonized with white mycelium which can be seen branching out in thin, white, finger-like filaments through the substrate. Eventually the substrate material will be pulled together and form into a solid white mass from which the first fruiting primordia will form.
Once the substrate is fully colonized, fruiting is triggered by oxygen, low-level light, and humidity.
If filter patch bags are used for production, then the top is taped down to eliminate the air gap at the top and seal off the filter patch, and X-shaped slits are cut in the side or tops of the bag to allow oxygen to reach the substrate. This process will initiate pinning the production of primordia, which appear as tiny specs of mycelium consolidation.
At this stage, humidity needs to be in the range 80-95 percent to help the mushrooms expand without drying out. Small-scale growers often mist the area surrounding the growing bag/container to help increase humidity, however, in a well-planted growroom this often isn’t an issue, and standing the bag on a damp towel or mat is usually sufficient.
 Two days after pinning, tiny oyster mushrooms are forming. These will double in size each day.
Each day the developing oysters will double in size with most being harvestable within five days of the first pins being visible. For many fast-growing species of oyster mushroom this can be as little as 2.5 to three weeks from spawning, making for a very rapid crop turnaround.
Oyster mushrooms tend to be produced in clusters. At harvest the cluster is grasped around the base and pulled while twisting at the same time and will come away easily from the substrate. The base of each cluster can be trimmed off with scissors to remove any remaining substrate and remove the tougher tissue at the base of the stem.
Once harvested, these are best eaten immediately or can be stored for a few days in paper bags under refrigeration. (Read also: Cooking with Cannabis: Cast Iron Skillet Broasted Oyster Mushrooms)
While oyster mushrooms grow rapidly and generally don’t have a lot of issues, the main problems encountered in growing areas are fungus gnats and small black flies which lay eggs in the substrate (the hatching larvae feed on mycelium and can introduce disease).
Another issue, particularly as the substrate ages, can be infection with molds or bacteria, in which case it is best to discard the block and start again.
Successive Oyster Mushroom Harvests
After harvesting, the mycelium-filled bag or container will rest for a week or two before producing the next flush of mushrooms. Each successive flush of fruit will yield a little less than the last as the substrate runs out of nutrients, however, they may continue to produce mushrooms for many weeks if conditions remain suitable. Once the process has finished, the spent mushroom substrate can be composted or used as mulch.
Once oyster mushrooms have been mastered there is a wide range of other gourmet mushrooms, such as shiitake or lion’s mane, which can be attempted with an investment in a little more equipment and knowledge. Overall, a good yield of oyster mushrooms can be obtained from a very small space in those unused corners of a growroom which is great accompaniment to a productive hydroponic system.