How to Propagate Cast Iron Plants
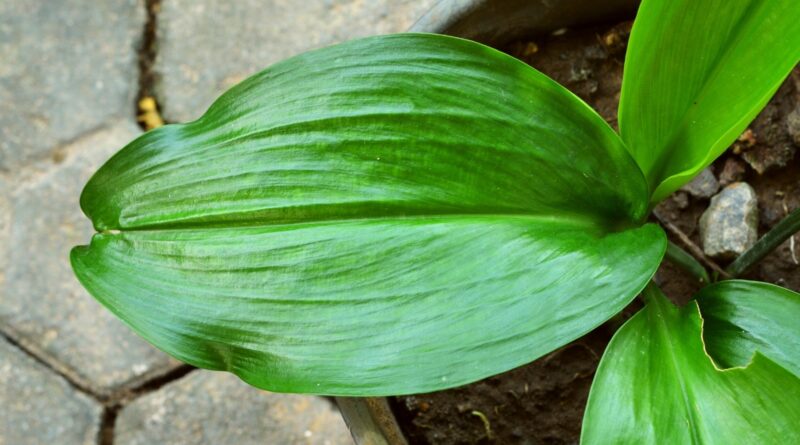
There are over 90 species of Aspidistra elatior known for their long, broad leaves, some with dark green foliage and others with variegations. These evergreen perennials grow about 24 inches tall. They rarely flower, but when they do, the cup-shaped burgundy flowers form at the base of the plant on short stems. These plants can be grown from seed, but because flowers are not seen very often, it is better to propagate them by division.
Propagating cast iron plants should be done when the plant is at its best during spring or summer, but any time of the year is suitable as long as you have a healthy plant to start with. The best way to get more plants is by digging up the rhizomes, dividing them, and repotting into fresh soil. This process takes some time because the roots are very delicate, so be prepared and take your time.
Step 1: Prepare Pots and Soil Mix


Before dividing your cast iron plant, prepare the pots and soil mix. Choose pots no more than 2 inches bigger than the root ball of the new plants. Each pot needs good drainage holes with a cover over the holes so that the soil doesn’t fall out the bottom. A layer of stones, crocks, or a piece of shade cloth will do.
Cast iron plants do not do well with waterlogged soil, so adding extra drainage materials is essential. However, too much drainage is also not ideal, as the nutrients will leach out too quickly. They need plenty of nutrients in the soil, so the balance of organic matter and drainage is paramount.
Mix 1 part commercial potting soil with 1 part perlite, vermiculite, or coco coir for drainage and 1 part compost for nutrients. Half-fill the pots, keeping some of the soil mix for backfilling.
Step 2: Remove Plant and Divide Sections


Remove the plant from its container gently and lay it down on a layer of newspaper or plastic. Remove any excess soil from the roots and carefully pull apart sections to repot into fresh soil. They dislike having their roots disturbed, so the least fussing at this stage will get a better result.
Do not use tools like a knife or spade to separate the rhizomes. These may damage them. If there is a lot of soil, you can rinse them gently in water to clearly see how to divide them logically into sections.
Each root ball should have two to three stems attached to be viable. Make sure the roots are healthy and not suffering from root rot. Cut off any roots that do not look healthy with a sterilized knife or sharp pair of pruners.
Step 3: Replant Each Divsion


Plant each division into its own pot, making sure to keep the plant at the same soil level as it was in the original pot. Do not plant too deeply. Backfill with soil and press down.
Make sure to replant the original plant back into the pot it came from or into a new pot that is a bit smaller. The original pot may be too big for the rest of the plant. They prefer being a little snug in their containers.
Step 4: Water Well


Use a watering tool to hydrate the new divisions, and then set the pots in a position with bright, indirect light. Although they will manage in low light, these plants do much better with moderate sun exposure, such the middle of a room with a south-facing window. However, do not place them in a spot with harsh, direct light, or they may get sunburnt.
Step 5: Caring for Newly Divided Plants
Make sure to care for your new divisions so they have the best chances of survival. They are pretty slow-growing, so don’t be alarmed if nothing happens for a while. These are the things to consider when tending baby plants:
Watering


Allow the soil to dry out between waterings. These are medium-moisture plants, so don’t leave them too long without water, but don’t overwater them. This could cause root rot.
Yellowing leaves are also a sign of overwatering. Don’t allow plants to sit in trays of water or in pot covers; rather, take them to the sink and allow the water to drain away before placing them back in position.
Light


Any variegated or speckled varieties need more light than others to keep their markings visible. Generally, this species needs bright indirect light but will also tolerate a wide range of lighting conditions which makes it a popular choice for filling dark corners.
Avoid direct sunlight, which will scorch the leaves. If you are looking for flowers in particular, they need more light, but there is not a guarantee that you will see them poking out from the soil.
Temperature


Coming from the tropical regions of China and Japan, cast iron plants do not do well in cold temperatures. Avoid any temperature below 50°F (10°C). The ideal temperature for these plants is between 65°F and 80°F (18°C and 27°C).
Humidity


Average humidity is fine. They do not require extra spritzing or added humidity.
Fertilizer


During the cast iron plant’s growing season in spring and summer, make sure to feed every month with liquid plant food. These plants need extra nutrients to grow well, and your new divisions will need a boost after the first month in their new pots.
Maintenance


Every so often, check the plants for any pests and diseases and remove any dying or yellowing leaves to keep them looking good.
Pests and Diseases


Although some pests and diseases affect these plants, they are relatively free from any issues. Potential issues are mentioned here for completeness.
Maintain space between plants to avoid overcrowding the leaves. Good air circulation helps prevent some of the pests and diseases associated with these plants.
Look out for spider mites, mealybugs, scale, thrips, aphids, and fungus gnats. Overwatering can cause root rot, which needs to be identified and dealt with immediately with a suitable fungicide. Also, prevent powdery mildew and leaf spot diseases by watering at the base of the plant rather than over the leaves.
Wiping the leaves clean with a damp cloth every month will keep them free of dust. I like to do this when they are being fed or watered at the sink.
Notes:
Cast iron plants can also be grown outdoors in the dappled shade of a tree in USDA zones 7-11.
The leaves are often used in flower arranging, especially in Japan for Ikebana and Seika – two types of flower-arranging styles from the area. They are often rolled into cylinders and are very useful for floral artists.
Around four varieties of cast iron plants have been awarded the Royal Horticultural Society’s Award of Garden Merit.
Final Thoughts
Cast iron plants are remarkably resilient. In the past, this stunned many people. In the Victorian era, gas lighting was installed and amount of soot and bad fumes was enough to kill off any but the hardiest plants (and people, but that’s another story). One of the longest-standing species was Aspidistra elatior.
Since then, it has had the reputation of being a heavy-duty houseplant. This also explains their nickname, “bar room plants.” Before there were rules about smoking in bars, the indoor air was generally filled with smoke. This plant was the only one that could survive that environment.
These fuss-free plants are easy to grow, so you can enjoy their lovely dark green tropical-style leaves. Propagation is easy with a little care, and getting more plants for cheap is always a good thing.


