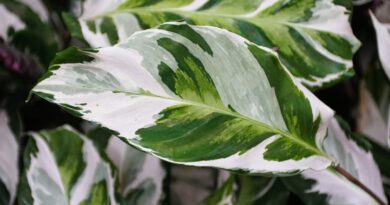
The 8 Most Common Orchid Diseases and How to Treat Them
When you put your time and attention into growing beautiful flowering orchids, diseases are the last thing you want to deal with. Unfortunately, they are a persistent threat to watch for to avoid your orchid’s early demise.
Diseases are usually tougher to tackle than orchid pests, especially if they have engulfed an entire plant. Prevention is far better than attempting treatment, particularly when dealing with viruses that can’t be removed once they attack.
Watch out for the symptoms of these eight common orchid diseases and how to avoid them.
Root Rot

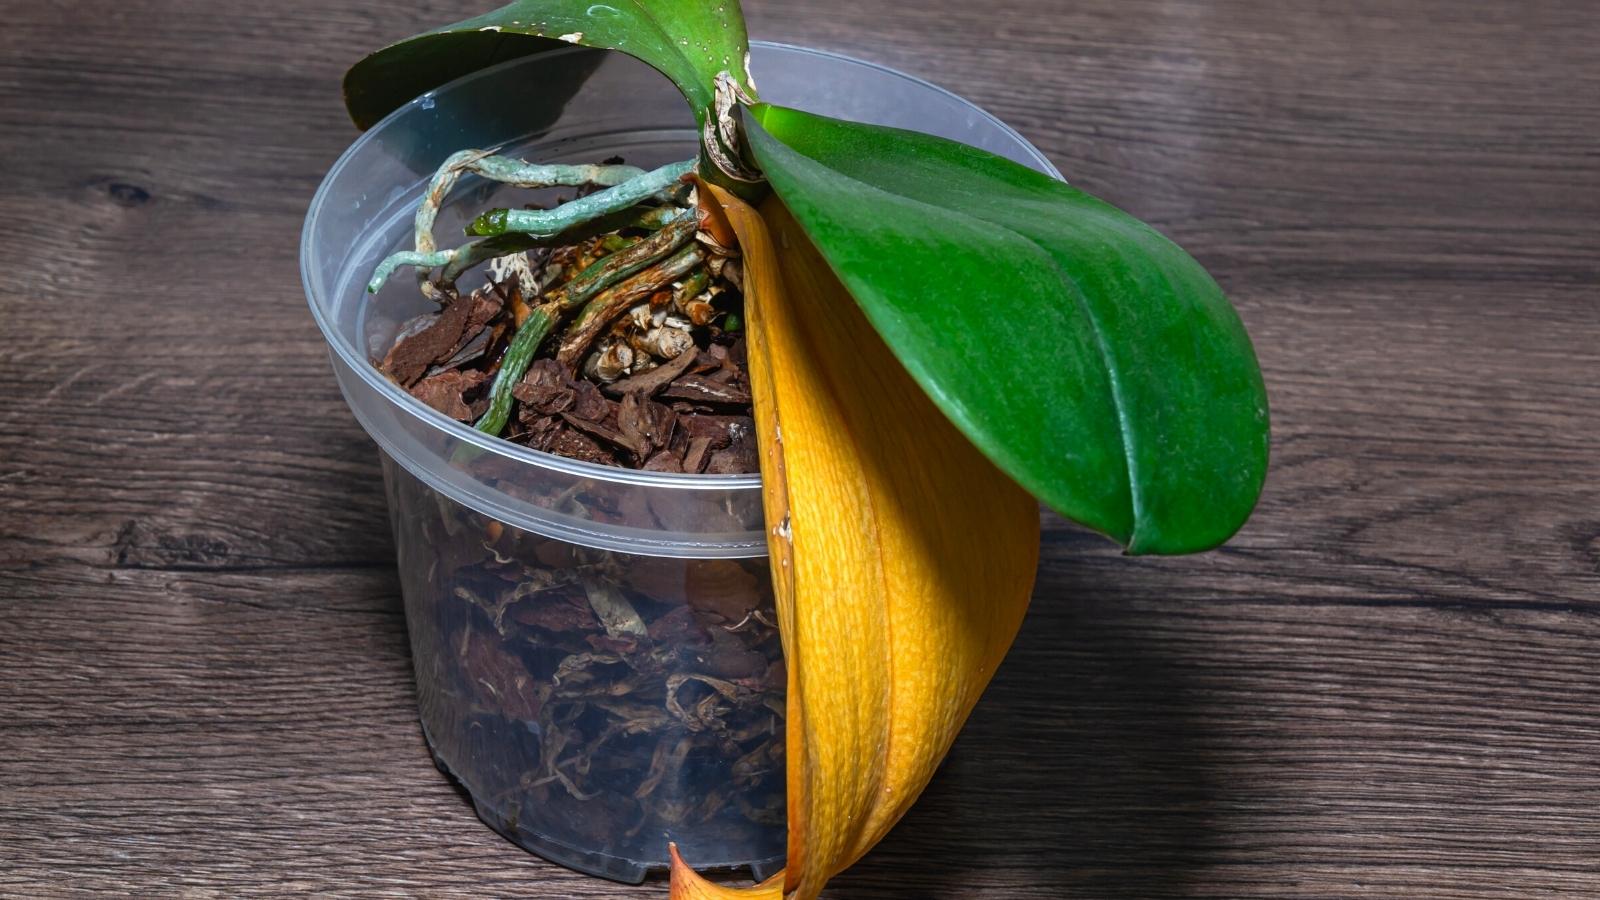
Root rot is one of the most common problems for indoor or potted plants. It is particularly problematic for epiphytic orchids that often receive more moisture and less airflow than they are used to. Commonly caused by overwatering or inadequate drainage, this fungal disease remains hidden beneath the soil until you notice signs of struggle above the soil.
Although root rot is typically caused by incorrect care or conditions, fungi (typically Rhizoctonia in orchids) are the true culprits. They are attracted to the moist and poorly aerated conditions caused by dense soil or overwatering, forming in the moisture to attack the roots of your favorite orchids.
Unfortunately, root rot is also tough to diagnose, especially in the early stages. The leaves begin to yellow or wilt, which is often believed to be caused by underwatering. However, the real damage occurs at the root level, where roots become mushy and turn brown or black.
As root rot spreads, the roots can become so damaged that they cannot absorb water and nutrients, ultimately killing the entire plant.
Treatment and Prevention
For treatment to be effective, you have to catch root rot early. Because roots are responsible for sending resources to the rest of the plant, extensive damage can’t be resolved once a large proportion of the roots are dead.
Inspect the roots often by gently removing the orchid from its container. Many orchid containers are clear, making checking without disturbance much easier. Don’t rely only on checking the top roots, as you may be missing a problem lower down in the container.
If you discover any mushy or discolored roots, trim the diseased roots back to healthy tissue, ensuring all infected parts are removed. If even a little section is left behind, the fungus responsible for root rot will continue to spread. Ensure you disinfect your shears when you’re done and repot into fresh orchid bark.
Orchids thrive in well-draining mediums like orchid bark, which allow excess water to escape and roots to breathe. Beyond that, letting the growing medium dry between waterings is essential. This, plus regular monitoring, will prevent root rot from coming back in the future.
Brown Rot

Brown rot (caused by Erwinia bacterial species) is a problem for many plants but is a particularly prevalent disease in orchids. This disease spreads incredibly quickly, especially in high humidity and warm temperatures. In moth orchids, it can take over the entire plant within a few days, becoming incredibly difficult to treat.
Erwinia attacks various parts of the orchid but is mostly present on the leaves. Initially, you’ll see water-soaked spots on leaves that quickly turn brown or black. In vanda orchids, the spots will start translucent before changing color; in other orchids, they may become reddish.
These lesions expand rapidly, emitting a foul smell that indicates a disease problem. It must be tackled immediately, as rot can engulf the plant in days, becoming almost impossible to treat.
Treatment and Prevention
Erwinia enters the plant from natural openings or any wounds that may be present. Once inside, it produces enzymes that rapidly break down plant tissues, causing the characteristic rotting and foul odor.
When you spot signs of brown rot, isolate the affected orchid immediately to prevent spread. Use sterilized shears to remove all infected tissue, leaving only healthy tissue behind. Sterilizing your tools between cuts is critical to prevent the spread of the bacteria to healthy parts of the plant.
For heavily affected plants, copper-based products may help, but they must be used carefully and according to the instructions to avoid plant damage. Also, avoid using copper products on dendrobiums, opting for other bactericides.
Brown rot is tough to avoid completely, but correct watering techniques can limit your risk. Water in the morning so that the foliage has time to dry during the day and focus the moisture on the soil or roots. Promote air circulation around your plants and limit splashing water on the leaves, as this can spread the bacteria.
Black Rot

Black rot is a damaging disease that spreads quickly from plant to plant, especially in wet and enclosed environments. It can infect all parts of the plant, including roots and bulbs, but it usually starts on the leaves first.
Black rot often starts on the undersides of orchid leaves, with small water-soaked spots. These spots gradually darken to a black or purplish color, indicating a black rot problem. As the infection spreads, these spots grow and merge to cover entire leaves.
Treatment and Prevention
This disease thrives in wet conditions, whether caused by damp soil or wet surfaces around your orchids. Unfortunately, due to the rapid spread of the issue (not only on the plant but to other plants), it’s best to discard severely affected plants to keep the rest of your orchids safe.
If your orchid is rare, you can try a few treatment options. Start by removing any visibly infected parts of the plant. Don’t forget to check below the soil if the problem has spread further. Fungicides targeting oomycetes can also be used to tackle the spread and any remaining traces.
Like most diseases, preventative measures involve monitoring the environment around your orchids. Overwatering, overhead watering, or generally keeping the orchids in damp environments should be avoided. Also, improve air circulation around your plants to prevent the spread of potential problems.
Fusarium Wilt

Like the previous diseases, Fusarium wilt thrives in the warm and humid conditions that orchids love. It functions slightly differently, though, infiltrating the vascular system of the plant and blocking water and nutrient flow. This leads to a slow but often deadly decline in health over several weeks.
The symptoms are more subtle, making early detection tough. The first thing to look out for is slightly yellow leaves and a general lack of growth. But the best way to diagnose the problem is to look at the stems. When cut open, you should see a purple discoloration due to the fungus inside the vascular system.
Treatment and Prevention
If you look into the stem and see the purple discoloration, it’s best to discard the plant. Treatment is tough when the infection has spread so severely, and discarding the plant will protect any other plants near your orchid from damage.
If you suspect Fusarium and there is no purple discoloration yet, pruning and drenches like thiophanate methyl can control the issue. Always follow the instructions closely and disinfect any tools between uses to prevent spread.
Preventative measures are your best line of defense. Ensure the potting medium drains well and the container has enough drainage holes to prevent waterlogging. Also, quarantine new orchids as Fusarium often travels in from new plants.
Anthracnose

Anthracnose is a fungal disease primarily affecting orchid leaves. Usually caused by the species Colletotrichum and Glomerella spp., it is one of the easier diseases to identify as it affects the plant above the soil rather than below.
Signs of anthracnose generally start at the tips and edges of the leaves and move inwards as the disease progresses. The tips of the leaves will begin to turn brown, developing patchy discoloration that can sometimes turn gray. The margin between diseased and healthy tissue is quite clear, slowly spreading to take over entire leaves and stems.
Treatment and Prevention
To manage anthracnose, think about preventive measures first. This won’t resolve a problem but may prevent the spread while you try to treat the plant.
Anthracnose spreads quickly in warm temperatures, high humidity, and low light. Managing these conditions (without compromising the health of your orchids) can stop a minor problem from becoming a major one.
If you notice symptoms of anthracnose, isolate the affected plant immediately. Remove infected leaves and treat them with a fungicide like thiophanate methyl. You can also alternate between systemic and protectant fungicides for severe issues, preventing anthracnose from returning and taking over again.
Leaf Spot

There are various types of leaf spot in orchids, including Septoria, Cercospora, and one of the most common, Phyllosticta. Again, the disease largely impacts the foliage where (as evident in the name) leaves develop tiny spots that slowly enlarge to discolor the entire leaf.
The exact symptoms of leaf spot vary depending on the pathogen, but all result in spotty discoloration in the leaves. Septoria typically causes small yellow spots with an irregular shape. Cercospora spots also start out yellow and eventually turn purple or black. Phyllosticta is known for causing oval-shaped spots that quickly become dark brown or black and slightly raised.
These spots can merge and spread regardless of the type, leading to significant leaf damage if left untreated.
Treatment and Prevention
Like many plant diseases, leaf spot is usually spread through water or contaminated tools. They infect the plant by penetrating the leaf tissue, causing the characteristic lesions and spreading from there.
If leaf spot is identified, follow the same steps as for anthracnose, with isolation as the starting point. Prune all the infected tissue and sterilize your tools as you go. If you don’t, you may spread the issue further.
In severe cases, fungicides can be helpful but don’t always resolve the problem. If it has spread rapidly, it’s usually best to discard the plant and start again. Just make sure you clean the area where the orchid was thoroughly to prevent spread and follow preventative measures going forward.
To prevent leaf spot, avoid wetting the foliage or keeping the container in a damp area, especially in cooler weather. Remove debris around the plant, and don’t overcrowd your containers to promote airflow.
Botrytis

Botrytis differs in that it prefers cooler environments but still loves high humidity. It is most likely to spread where there is little air circulation, like in smaller and crowded greenhouses. Botrytis is known for attacking the delicate flowers of orchids, but it can also affect leaves and stems.
The symptoms of botrytis blight are most noticeable on the flower petals. Infected flowers display small brown to black spots, which can rapidly enlarge and cover the entire flower. In high humidity, you may also see a gray mold on the affected areas – the spore-producing structures of the fungus.
Treatment and Prevention
Botrytis treatment starts with something tough for orchid lovers to do – removing the flowers. Since the petals are the primary target, you need to remove these structures to stop the problem from spreading.
After pruning any visible areas of damage, use a protectant fungicide to limit the chances of spread. If even a slight problem remains, it will eventually spread to take over the entire plant again. Always follow the instructions closely, as treatment can differ from product to product. Regular inspections, especially during cooler weather, are important for follow-up treatments.
To prevent botrytis (at least as much as you can control), follow the same good garden hygiene practices mentioned previously. Another helpful strategy is removing dead or dying flowers as soon as you spot them, as these can become quick targets for infection.
Mosaic Virus

Many damaging viruses can tackle orchids, but cymbidium mosaic virus is one of the most common. It is spread by plant sap – often when you unsuspectingly use infected tools on your orchids. Viruses can also be spread through plant debris or in crowded environments where leaves touch one another.
Unlike fungal or bacterial diseases, viral infections are not treatable once established. That’s why taking action as soon as you spot any symptoms is vital to keep the rest of your plants safe. Symptoms include a distinctive mottling or ‘mosaic’ pattern on the leaves – hence the name. This pattern starts yellow or light green, typically darkening depending on the viral strain.
In some cases, leaves may become distorted or strangely textured. It can also spread to the flowers that eventually streak or break, ruining their intricate and delicate look.
Treatment and Prevention
Unfortunately, there are no treatments for viral infections in orchids. Ultimately, it’s best to dispose of the plant and focus on implementing preventative measures to avoid future infections.
Always use sterilized tools when cutting or handling plants, especially when moving between different orchids or from previously damaged plants to healthy ones. Avoid sap contact between plants, as even a small amount of infected sap can transmit the virus. Isolating new plants can also help prevent the introduction of the virus from outside sources.
Final Thoughts
Diseases are tough on orchid owners and usually result in the early death of your plant if not handled quickly. That’s why it’s best to implement preventative measures to avoid seeing any of these problems in the first place.